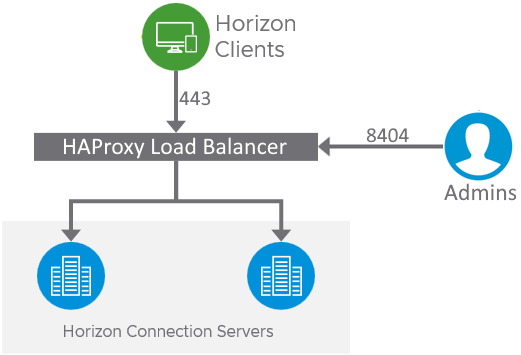
このチュートリアルでは、Connection Server Horizon または App Volumes Manager のロード バランサの作成について説明します。
VMware Linux ディストリビューション: Photon OS 5.0 と、オープンソースのロード バランサー: HAProxy を使用します。
前提条件 :
Photon OS 5.0 OVA x86_64 リンク
2 GB RAM / 16 GB HDD
1 IPアドレス
vSphere インフラストラクチャ上に OVA を導入する
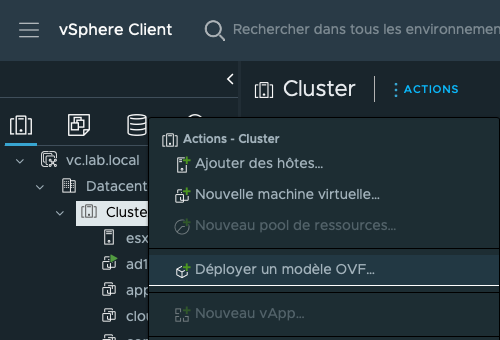
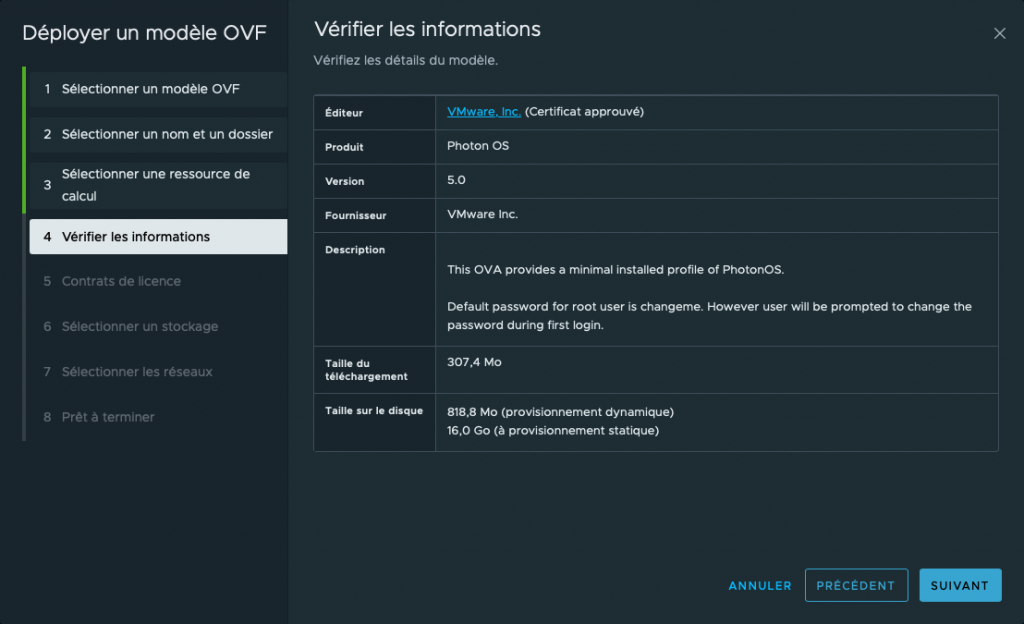
アプライアンスを展開したら、電源をオンにします。
アプライアンスは DHCP にあり、root アカウントとパスワード changemeを使用して SSH 経由で接続します。
パスワードを変更します (必須)。

コマンドでパッケージの更新を開始します tdnf upgrade -y

ファイルを編集してイーサネット カードの DHCP を無効にします /etc/systemd/network/99-dhcp-en.network
DHCP=no
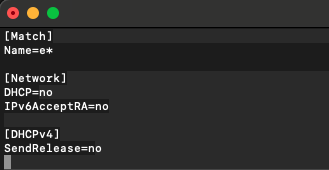
仮想マシンに固定IPアドレスを設定するには、ファイルを作成します。 /etc/systemd/network/10-static-en.network
次のコンテンツを追加します。
[Match]
Name=eth0
[Network]
Address=<AdresseIP_de_HAProxy>/24
Gateway=<AdresseIP_Gateway>
DNS=<AdresseIP_DNS>
[DHCP]
UseDNS=false
拡張子が .network の構成ファイルを作成した後、chmod コマンドを実行して権限を 644 に設定する必要があります。
chown systemd-network:systemd-network /etc/systemd/network/10-static-en.network新しい名前付きファイルを作成する /etc/sysctl.d/55-keepalived.conf
次のコンテンツを追加します。
#Enable IPv4 Forwarding
net.ipv4.ip_forward = 1
#Enable non-local IP bind
net.ipv4.ip_nonlocal_bind = 1
/etc/systemd/scripts/ip4save ファイルを編集する
次の 4 行を追加します。
-A INPUT -p icmp -m icmp --icmp-type 8 -j ACCEPT
-A INPUT -p tcp --dport 80 -j ACCEPT
-A INPUT -p tcp --dport 443 -j ACCEPT
-A INPUT -p tcp --dport 8404 -j ACCEPT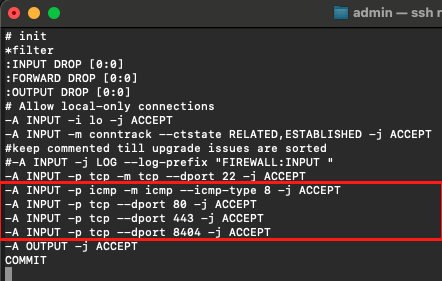
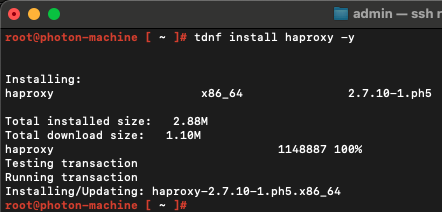
コマンドを使用して HAProxy をインストールします tdnf install haproxy -y
HAProxy 用の新しいディレクトリを作成して chroot します。
mkdir /var/lib/haproxy
chmod 755 /var/lib/haproxy
サンプル HAProxy 構成ファイルの名前を変更します。
mv /etc/haproxy/haproxy.cfg /etc/haproxy/haproxy.old新しいファイル /etc/haproxy/haproxy.cfg を作成します
次の内容をコピーし、強調表示されたフィールドを編集します。
# HAProxy configuration

                #Global definitions
                global
                chroot /var/lib/haproxy
                stats socket /var/lib/haproxy/stats
                 daemon

                defaults
                 timeout connect 5s
                 timeout client 30s
                 timeout server 30s

                ### Configuration des statistiques ###
                userlist stats-auth
                 group admin   users admin
                 user admin insecure-password Horiz0n
                 group ro users stats
                 user stats insecure-password ReadOnly
                frontend stats-http8404
                mode http
                bind <IP_HAProxy>:8404
                default_backend statistics
                backend statistics
                mode http
                stats enable
                stats show-legends
                stats show-node
                stats refresh 30s
                acl AUTH http_auth(stats-auth)
                acl AUTH_ADMIN http_auth_group(stats-auth) admin
                stats http-request auth unless AUTH
                stats admin if AUTH_ADMIN
                stats uri /stats
                ######

                ### Horizon Connection servers ###
                frontend horizon-http
                mode http
                bind <IP_HAProxy>:80
                # Redirect http to https
                redirect scheme https if !{ ssl_fc }

                frontend horizon-https
                mode tcp
                bind <IP_HAProxy>:443
                default_backend horizon
                backend horizon
                mode tcp
                option ssl-hello-chk
                balance source
                server CS1 <IPConnSrv1>:443 weight 1 check inter 30s fastinter 2s downinter 5s rise 3 fall 3
                server CS2 <IPConnSrv2>:443 weight 1 check inter 30s fastinter 2s downinter 5s rise 3 fall 3
######
次のコマンドを入力して、再起動するたびに HAProxy を永続化します。
systemctl enable haproxy.servicePhoton OS アプライアンスを再起動します。
rebootHAProxy が動作できるようになりました。
ロード バランサ経由で接続するときに 421 Unknown エラーが表示される場合は、Horizon Console の各接続サーバに HAProxy の IP アドレスまたはホスト名を追加する必要があります。

HAProxy サービスのステータスを確認するには、次のコマンドを使用します。
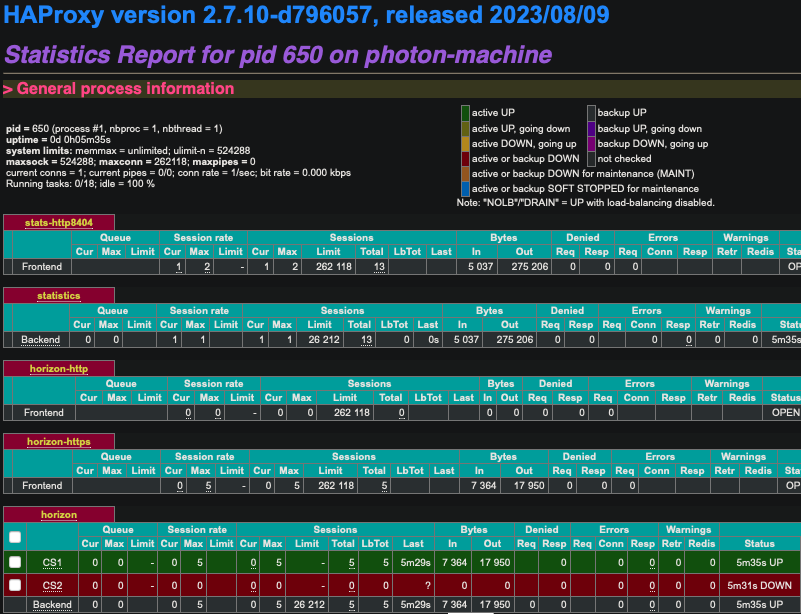
systemctl status haproxy.serviceHAProxy 統計を取得するには、/etc/haproxy/haproxy.cfg ファイルで定義されたパスワードを使用して次の URL に接続します。:
http://<AdresseIP_HAProxy>:8404/stats


コメントを残す